Build & Debug a Flow
We will build a simple test flow to validate your custom module using just 2 modules:
- Data Generator (to provide test data to your module)
- Your Custom Module (the module you want to test and debug)
For your specific module, there may be other modules more suitable to generate the test data, such as an MQTT Subscriber, HTTP Listener, or File Reader. The Data Generator is a simple way to get started.
Prerequisites
Before you begin, ensure you have:
- A running Crosser Node where you have access to view the logs.
- The module is registered in Crosser Control Center.
- The module package is uploaded to nuget.org.
When the flow is built, we will open a remote session to the Node from Flow Studio. The flow will be temporarily deployed to the Node, allowing you to see real-time data flow and debug information directly in the browser.
Building the Test Flow
Step 1: Create a New Flow
- Open Flow Studio in Crosser Control Center. A new flow draft will appear automatically.
- Find the Data Generator and your custom module in the module palette on the left.
- Drag both modules onto the canvas.
- Connect the Data Generator's output to your custom module's input by drawing a line between them.
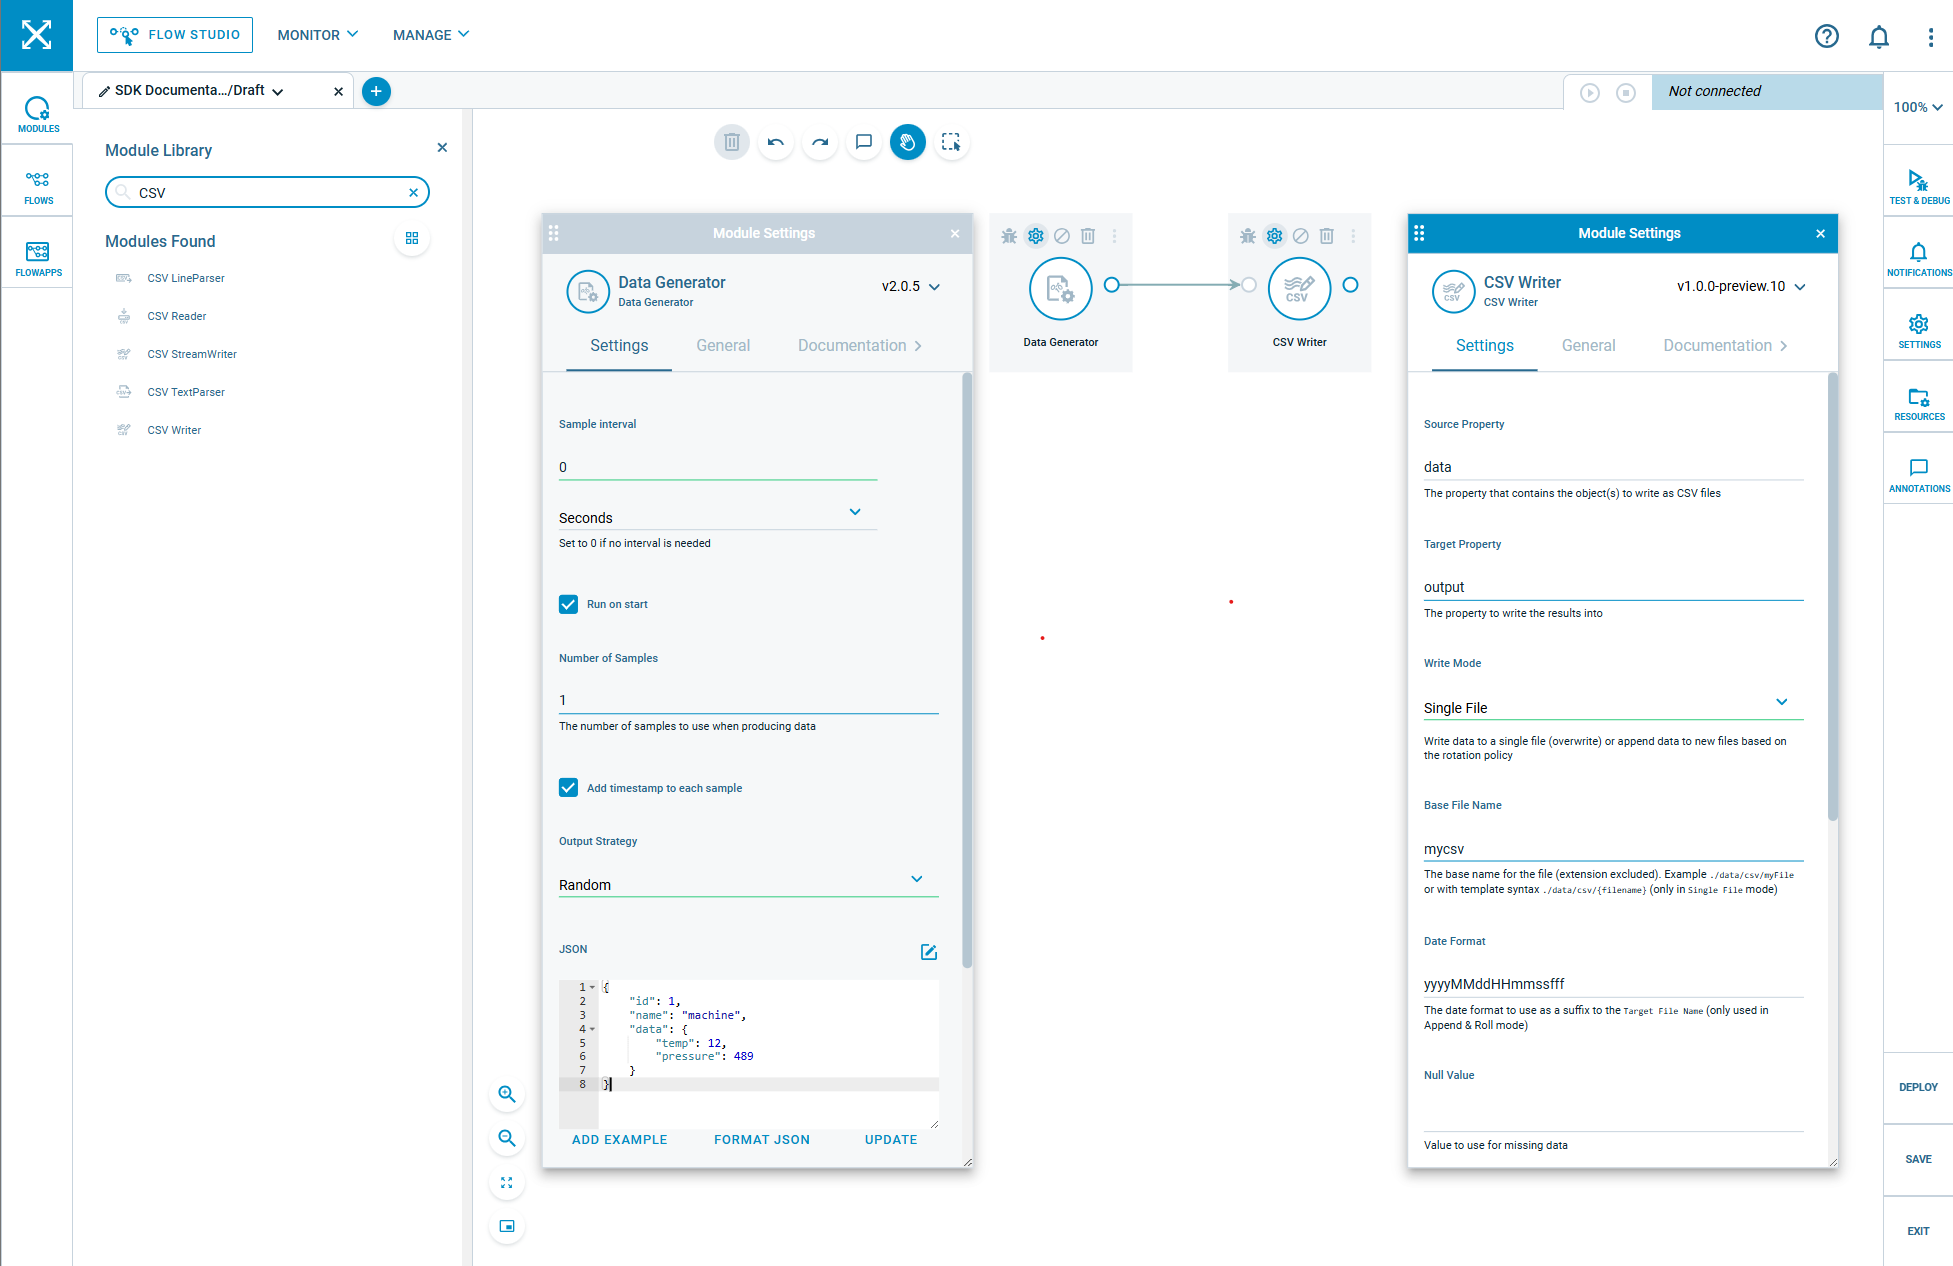
Step 2: Configure the Data Generator
The Data Generator will provide test data for your module. Configure it to generate data that matches what your module expects:
- Click on the Data Generator module
- In the settings panel, click on the ADD EXAMPLE button and configure the JSON field with a JSON structure that your module can process.
- Set an appropriate Interval . Use
0in case only one message is needed for testing.
Example data configuration:
{
 "id": 1,
 "name": "machine",
 "data": {
  "temp": 12,
  "pressure": 489
 }
}
Step 3: Configure Your Custom Module
- Click on your custom module
- Configure any required settings in the settings panel including the source property. This setting tells your module where to find the input data in the incoming message.
- Set up any credentials or resources your module needs
- You can read the documentation for your module by selecting the Documentation tab
- Save the flow with a descriptive name like "Test MyModule". If the flow is only for personal testing, you can make it private.
Start Testing Your Module
To test our module we will run it in Test & Debug mode connected to your Crosser Node.
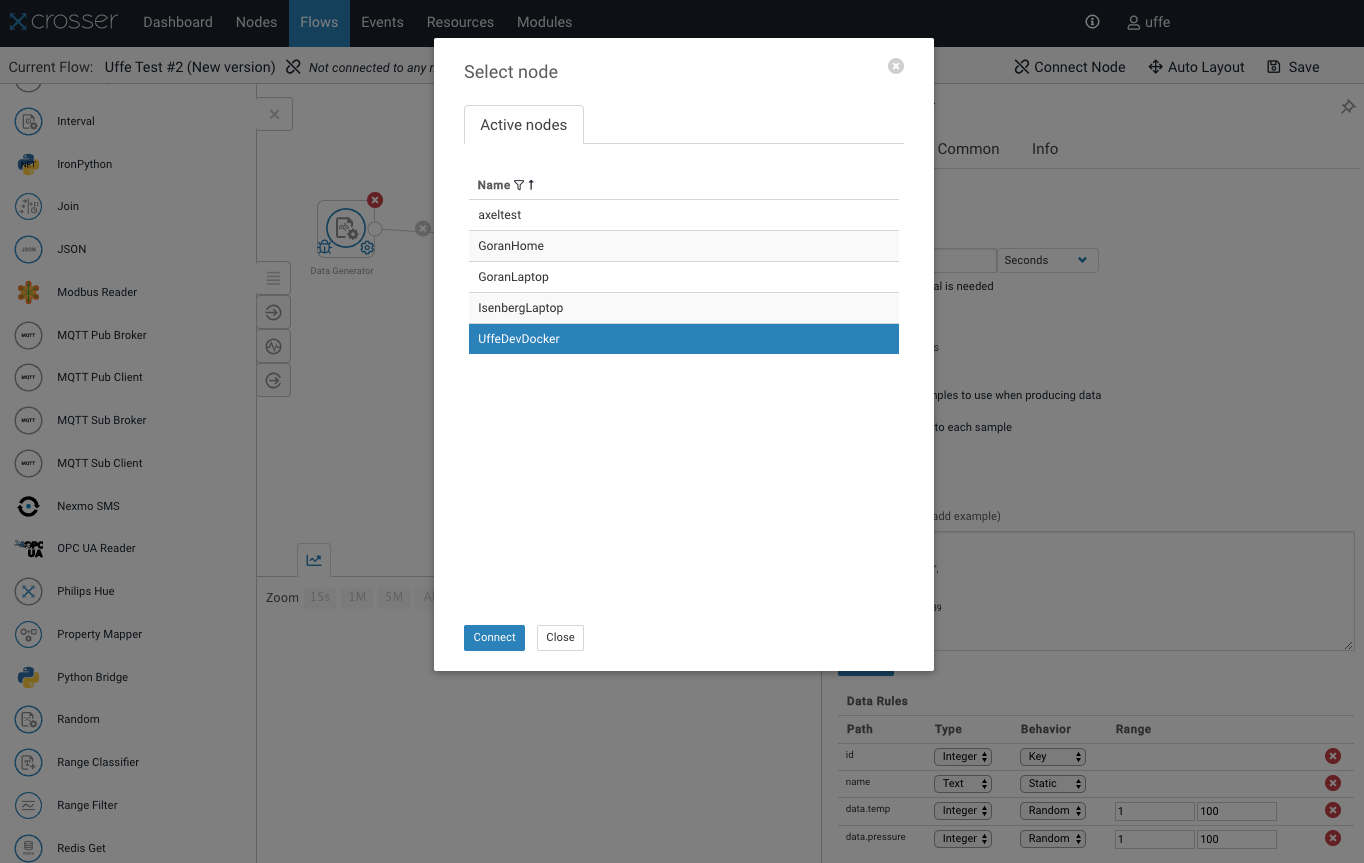
Step 1: Connect to Your Node
- Go to the Test & Debug panel in Flow Studio
- Select your Node from the list of available nodes
- The connection indicator should show that you're connected
Step 2: Configure Debug On Your Module
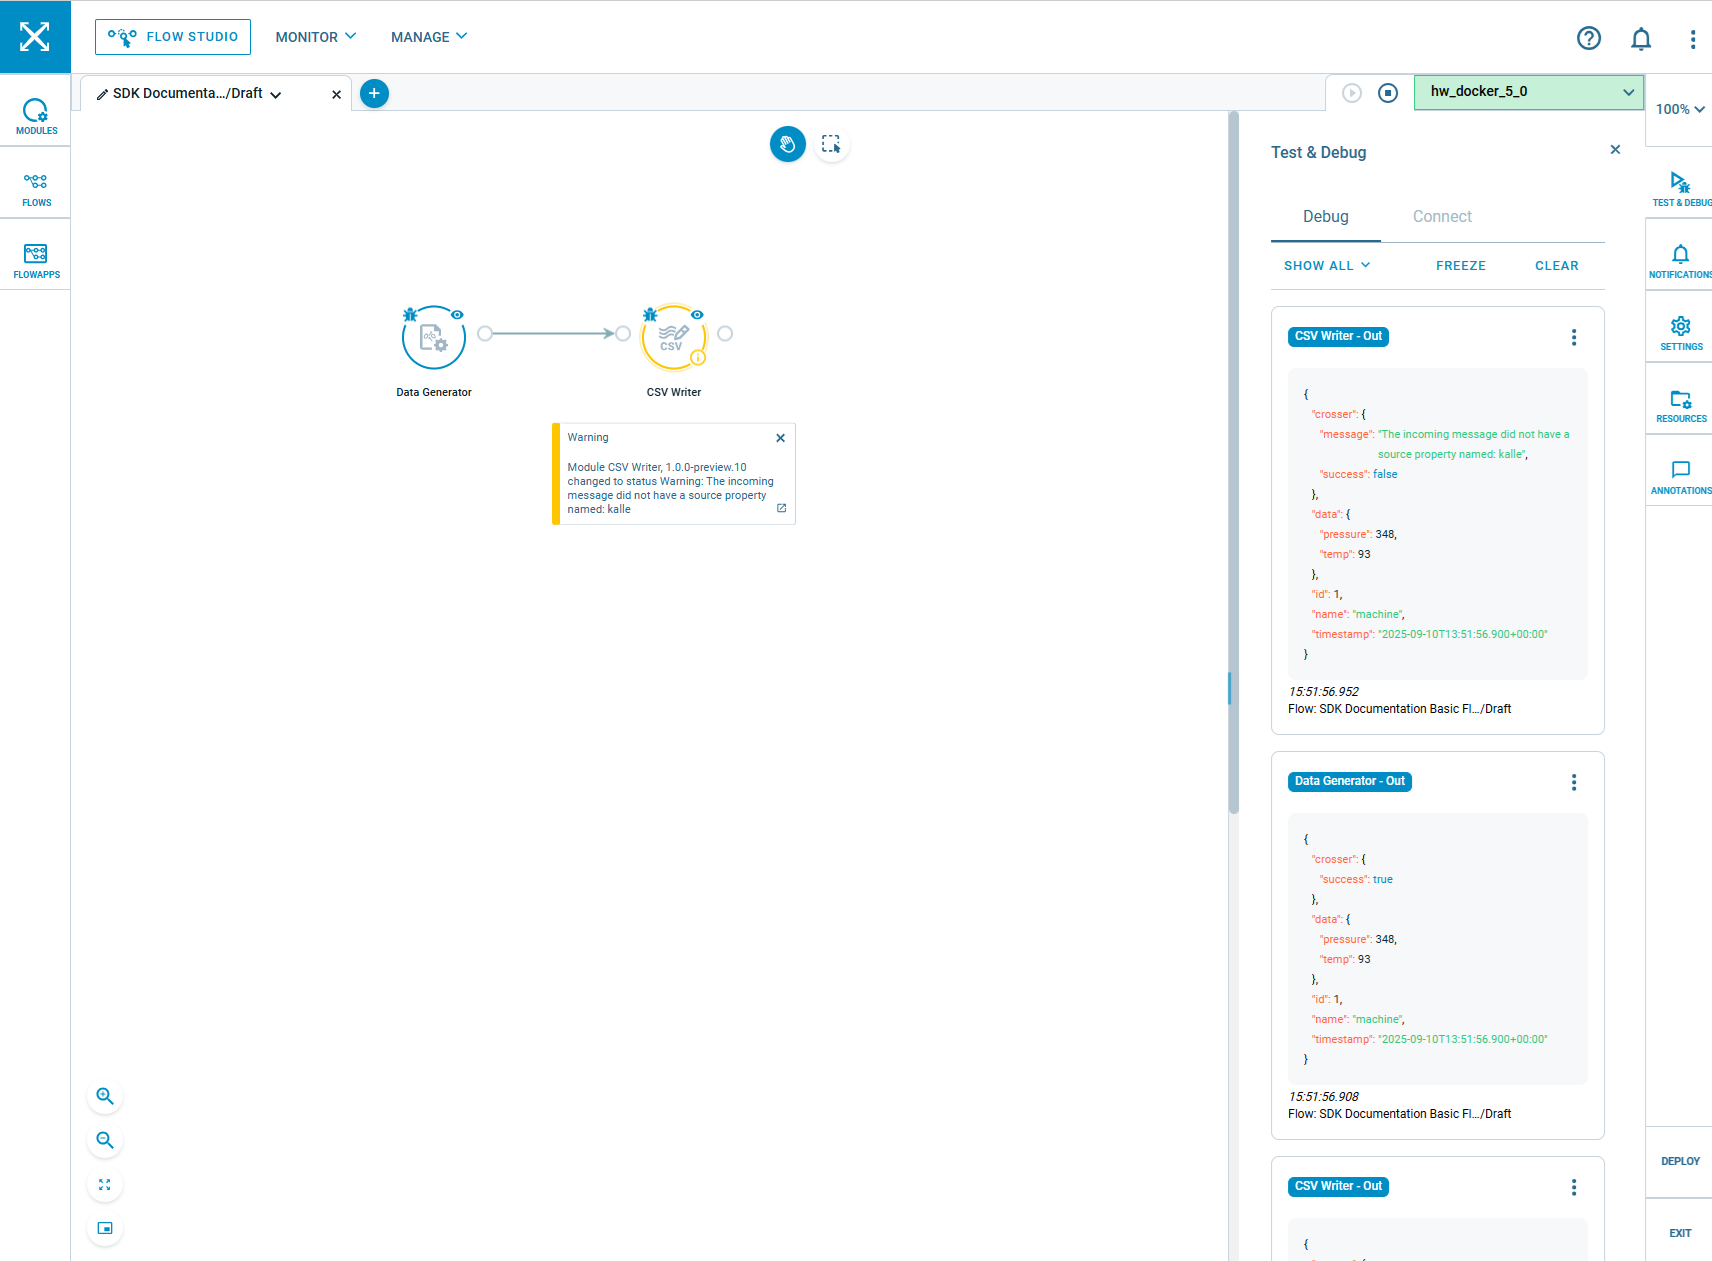
You can enable debug output on your module by clicking on the debug icon on the module in the flow. This will allow you to see debug messages in the debug panel when the flow is running.
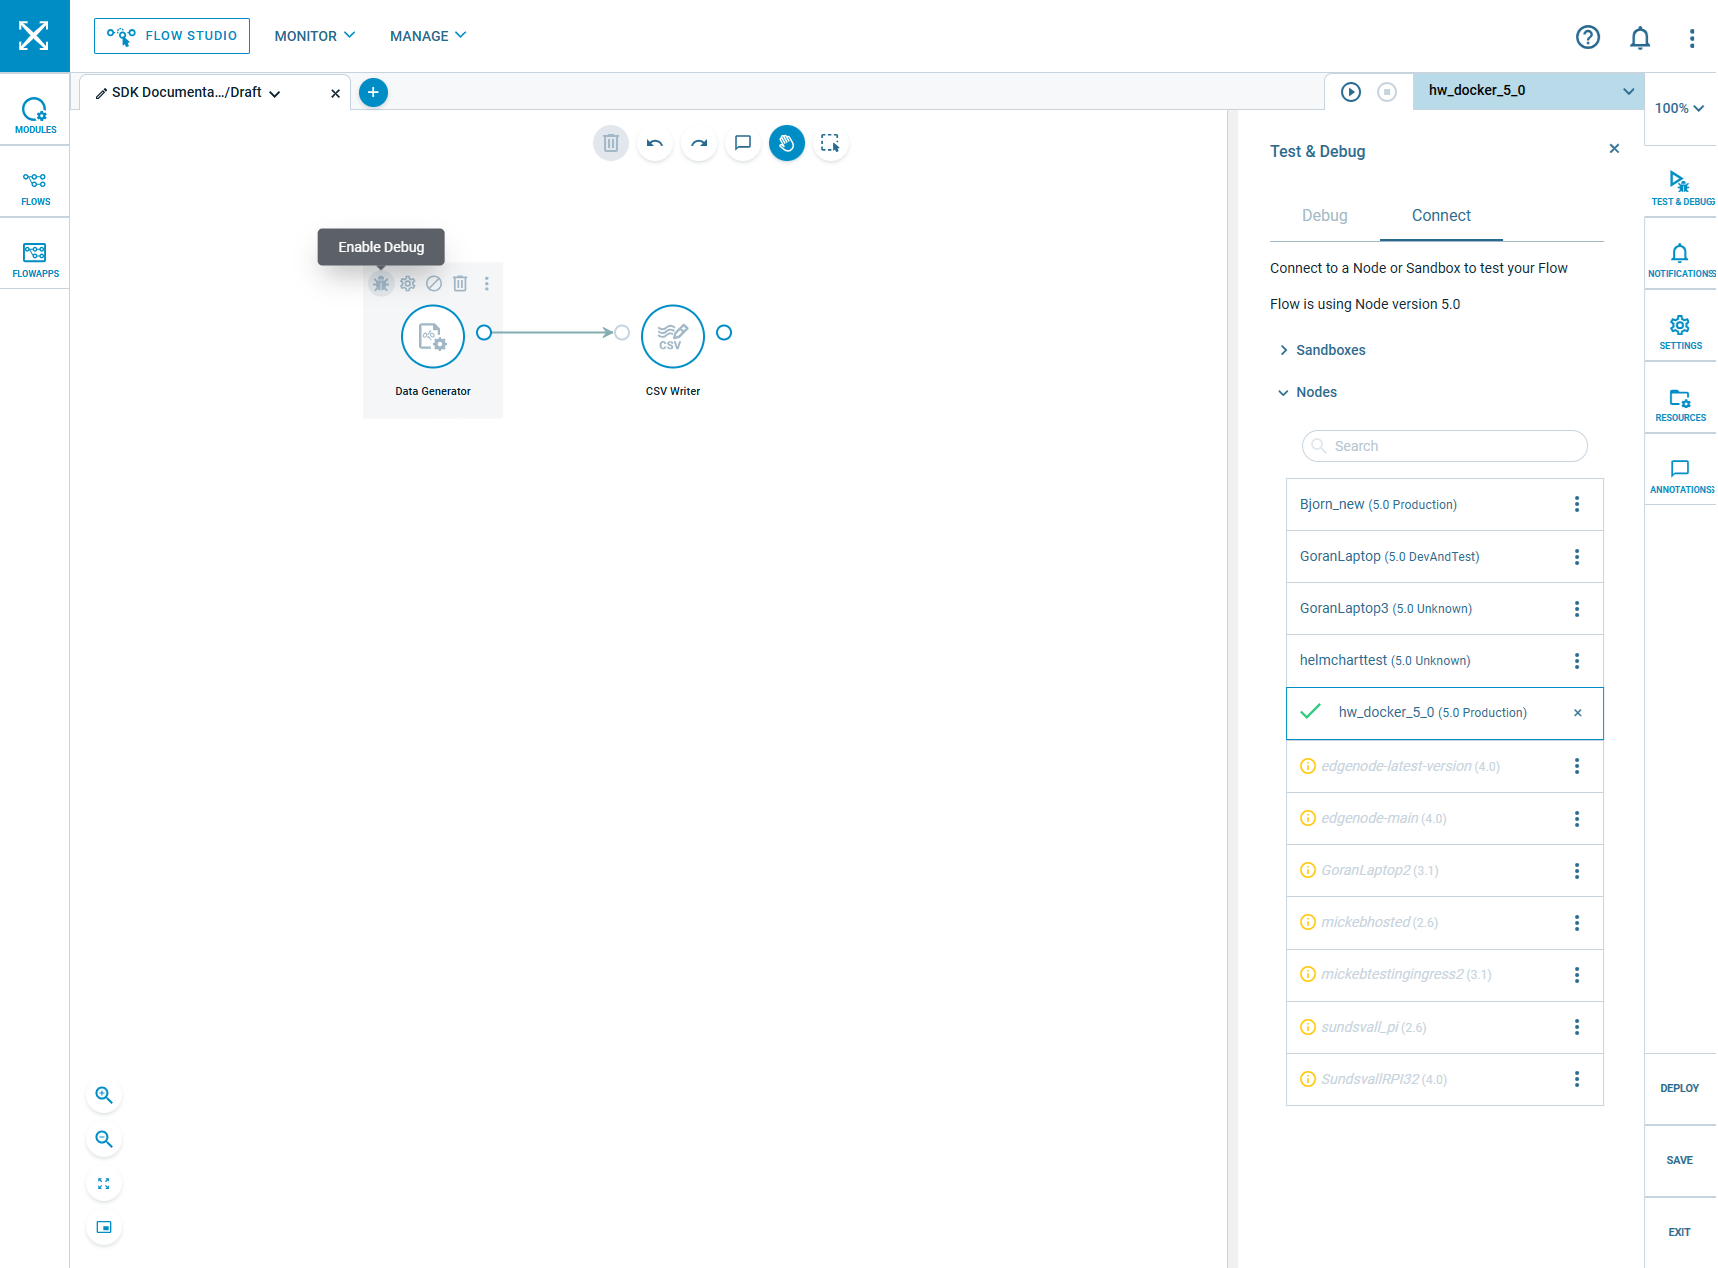
Step 3: Start the Remote Session
- Click the Play button in the Test & Debug toolbar to start the remote session
- The flow will be deployed to your Node (this may take a few seconds as your flow package is downloaded to the Node.)
- Once the flow is running you will receive messages in the debug panel from the modules where debug is enabled.
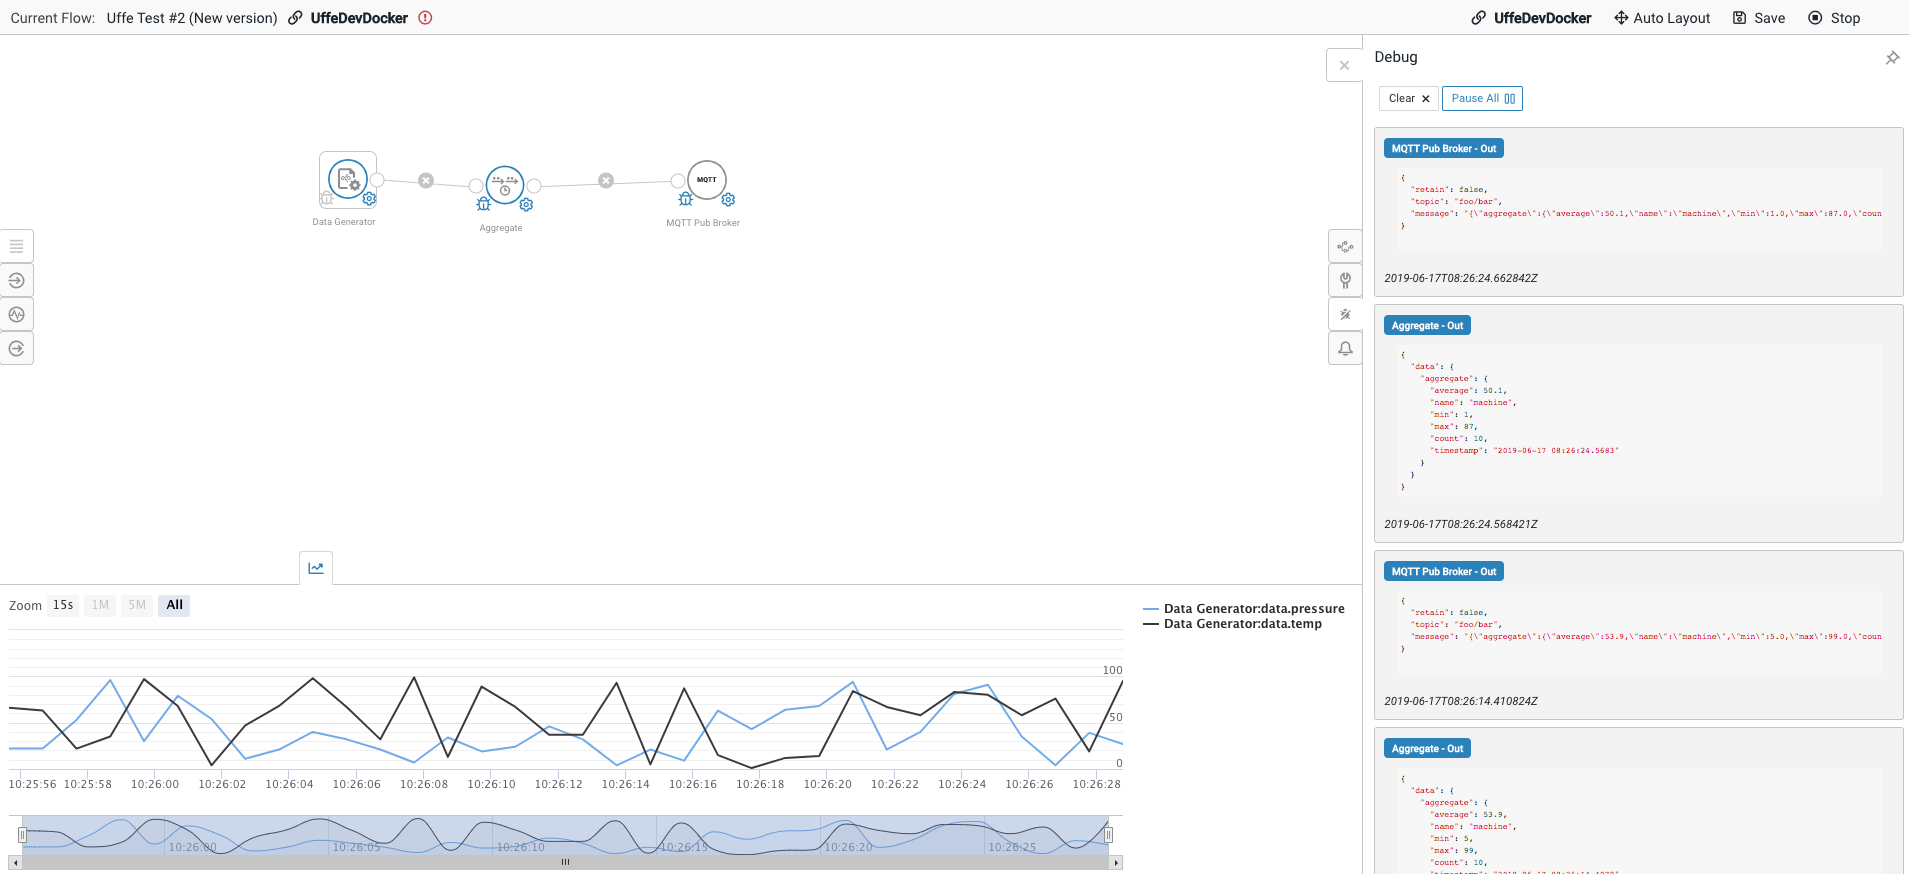
Step 4 Monitor Your Module
Once the flow is running, you can monitor your module in real-time:
Debug Panel shows messages flowing through your module. Notifications Any debug or error messages from your module. Module Status: Each module shows a yellow status indicator when a warning is present. If there is an error the flow will be stopped.
Debugging Your Module
Common Issues and Solutions
Module Not Starting:
- Verify all required settings and credentials are configured correctly.
- Look for error messages in the debug panel.
- Check the Node logs for issues.
No Output Data:
- Verify the input module is producing messages (check debug panel).
- Ensure your module is properly processing input messages.
- Check for exceptions that are ignored in your module code.
Unexpected Output:
- Compare input vs output messages in the debug panel.
- View the types of the input and output data by using a debug module in the flow.
- Add debug logging to your module code to trace data transformation.
- Verify your module logic handles the input data format correctly. The simplest way is to reproduce the error in a unit test using the same input data.
Iterating on Your Module
- Make Changes: Update your module code based on test results.
- Redeploy: Upload the updated module package to nuget (it can take some time for nuget to index the package) and then register it in Crosser Control Center.
- Update Flow: In Flow Studio, update your flow to use the latest version of your module.
- Restart Session: Restart the remote session to use the new version.
- Retest: Verify your changes work as expected.
Advanced Testing
For more comprehensive testing:
- Vary Input Data: Modify the Data Generator to test different scenarios.
- Load Testing: Increase the Data Generator frequency to test performance.
- Error Conditions: Configure the Data Generator to send invalid data to test error handling.
- Add Debug Module: Insert a Debug module after your custom module to capture and inspect all output.
Next Steps
Once you've validated your module works correctly in this simple flow:
- Test it in more complex flows with multiple modules.
- Monitor performance and logs in a production-like environment.
For troubleshooting complex issues, see the Module Troubleshooting Guide.